Bonsai Tree Soil
Often when buying a bonsai tree it arrives in clay-based soil that over time can become quite compacted. An essential method for bonsai tree care is to repot your plant into a new mix of soil.
The three key aspects to consider to create the best soil for your bonsai are:
- Drainage
- Water retention
- Air Spaces
So let us dive right into these aspects:
Drainage
Firstly, drainage is very important when it comes to watering your bonsai. Bonsai trees are more likely to suffer from over-watering than dehydration and a key part of this is making sure your soil allows an adequate amount of drainage to prevent roots from decaying.
The soil must be very free draining, so much so that when watering your bonsai the water will not just sit on the surface. It must drain straight through the soil and start flowing out of the drainage holes after at least half a minute.
Water retention
While soil must allow water to pass through, it must also be able to hold a certain amount of water to provide enough moisture until the bonsai tree is next hydrated.
Typically a garden mix soil will largely contain fine particles which over time become compacted, this can be prevented by using larger particles whether it be organic or mineral to help retain moisture. We will get into this more in a moment.
Air spaces
Lastly, allowing your bonsai tree roots to breathe will help maintain their health. When soil is compacted this becomes an issue and roots will struggle to take in their required nutrients that require oxygen to do so.
So…what soil is best?
A Japanese soil called ‘Akadama’ is the most well-known and sought-after bonsai soil mix on the market. It retains water well but also allows sufficient drainage and ample air space. It is a hard, coarse, clay-like soil that has a granular structure with particles ranging from 1-6mm (up to 1/4 inch).
To get the best out of your bonsai it is best to use Akadama or to mix your own soil to control the ingredients and the particle sizes.
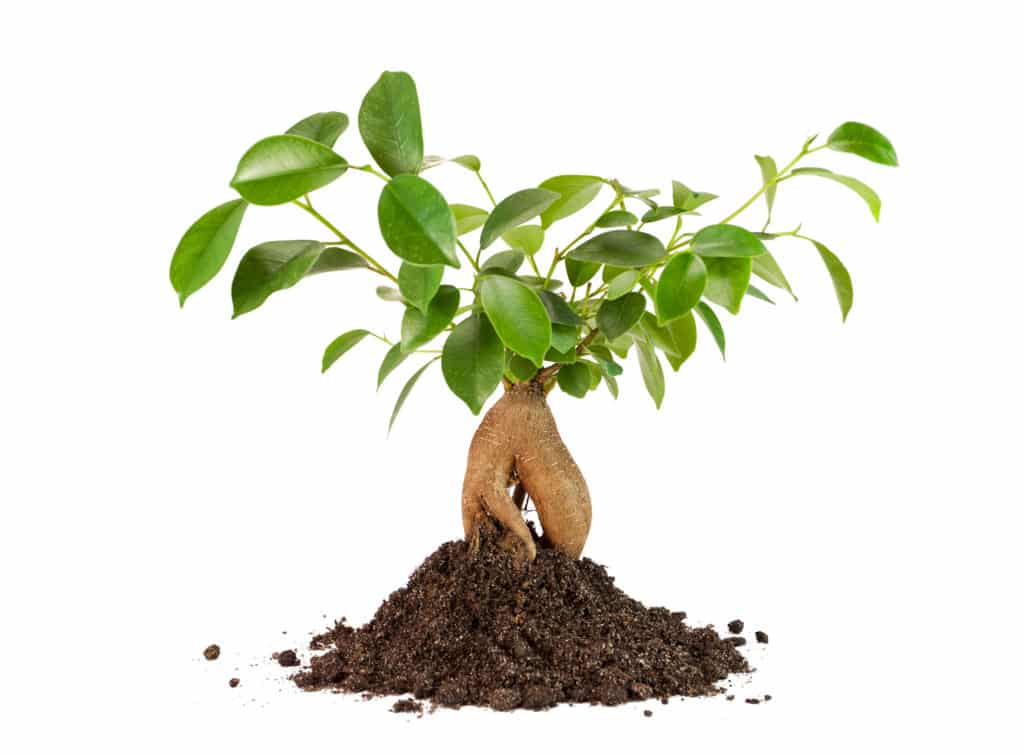
Mixing your own soil
Repotting a bonsai into your own soil mix is good practice when caring for your bonsai as they often become compacted in the original soil when buying a bonsai. As mentioned above, mixing your own soil is a good alternative to using the slightly expensive Akadama soil.
The main two ingredients are organic matter e.g. peat, leaf mold, composted bark, and grit e.g. coarse sand. Water retention comes from the organic matter, which should not be too decomposed so that it crumbles into dust easily when dry, instead it should be moist and when squeezed tightly it will spring apart when pressure is eased.
Lumps larger than 5mm (1/4 inch) should be broken up or discarded during the sifting process, as well as particles smaller than 2mm which would clog up the base of the pot. This is where a soil sieve will come in handy. The matter must be sieved when damp, not wet which will clog the sieve, and not dry where particles will be wasted by crumbling into dust.
To keep your new soil mix breathable and free-draining, adding grit that has been sieved for particles sized between 2-5mm (up to 1/4 inch) depending on your pot size is a necessity. One important note is to only use prepared horticultural grit or sand, not builders or beach sand.
River sand is the most preferred type of grit due to the rounded grains that prevent it from fitting together and in turn, do not become tightly compacted. Crushed granite or flint can also do the job and is more easily sourced, however, their grains have flat sides. This can be countered by using a more whole organic matter such as composted bark rather than the leaves or peat.
Now to mix the organic material with your grit. Combine the two in roughly equal proportions while the organic matter is still slightly damp for similar reasons as the sieving process. If your bonsai tree is more adapted to drier conditions then it is safe to add more coarse grit, however, if the opposite is the case then it is best to avoid adding more organic matter. Instead of reducing the aggregate size of the grit to around 1-3mm (1/8 inch) or replace some of the grit with a proprietary granular soil conditioner. Adding a soil improver such as calcined clay or crushed pumice helps to keep your soil both absorbent and free-draining for a longer period.
Watering A Bonsai
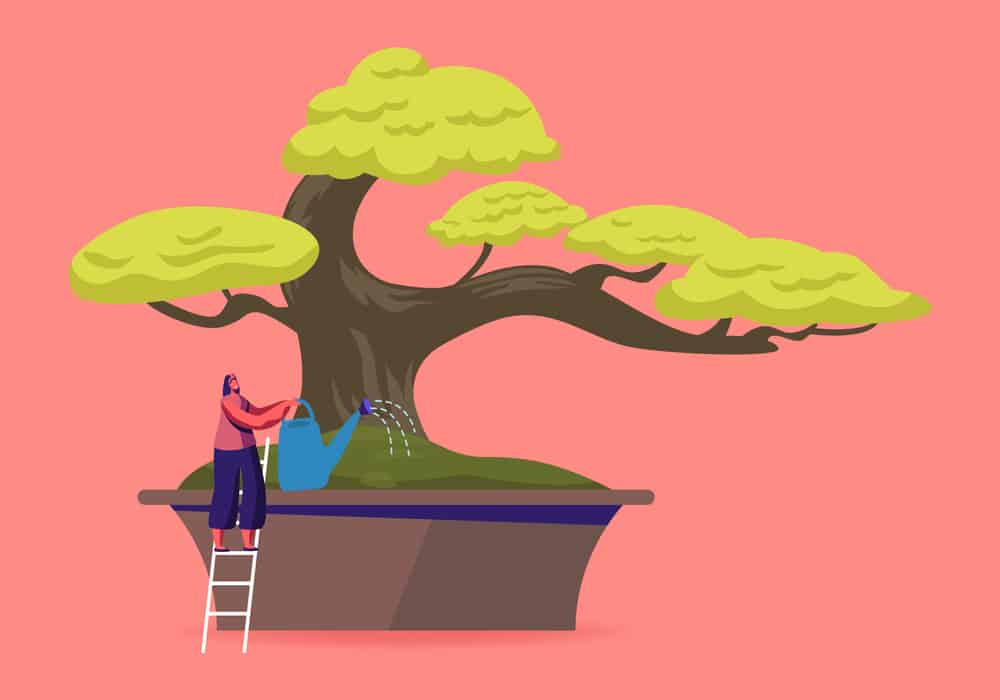
Sorting a watering schedule will greatly benefit your bonsai tree’s growth, and once you are in a routine it will become a lot easier to remember to do and your tree will thank you for it. The first important step to watering your bonsai is to check the dampness of the soil to discover if your tree actually needs a drink.
A bonsai tree can suffer if it goes without water for a short period of time especially in peak summer, with bonsai roots unable to access the ground’s moisture, and especially if you have an indoor bonsai forgetting to water your tree on time could cause the soil to completely dry out.
Interestingly though, bonsai are more commonly drowned by excessive watering rather than suffering from drought. This is because if there is too much stagnant water it will starve the roots of oxygen which will cause them to die and rot. So caution must always be taken before watering.
One of the best bonsai tree care tips is the chopstick test method to check the dampness of the soil which sometimes can be visually deceiving. If you have repotted your bonsai tree and used your own soil mix, deciding whether your tree needs a watering can be easier as looser soil can be scratched back, but if your soil has become quite compacted or if you are still not 100% certain that the deeper roots require watering or not, certainly use this method to help.
The Chopstick test
Take a softwood chopstick eg: a kebab stick and push it straight into the soil, careful to avoid any roots, to the bottom of the pot. Often the corners of the pot are best. Leave this for 20 minutes to allow it to soak up any moisture (if there is any), then remove to check by gently feeling the buried end. If the stick is moist then no watering is needed, if quite dry then it will require watering and if the chopstick feels bone dry then it will require instant watering using the immersion technique (see below).
Keep utilizing the chopstick test to help develop a watering bonsai schedule and to make sure you hydrate your tree when it actually needs it. The regularity will obviously change throughout the various seasons as the bonsai pots and branches heat up or cool down.
Type of Water?
Generally speaking, water that is fit for humans is fine for a bonsai tree. But rainwater is best for all plants, but cannot be always accessible. Tapwater is fine however it is good practice to attempt to evaporate as much chlorine as possible by allowing tap water to stand in an open container for a few hours. You should always try and use water that is at room temperature so as to not shock the roots when they become hydrated, but if it is an especially hot day your tree will enjoy the water that is a few degrees cooler to refresh the roots.
How to Water
The best method for watering bonsai is to use a fine rose head on a watering can otherwise it will not be easy to soak your soil evenly. Gently does it, water until it begins to flow out of the drainage holes then pause and wait for a minute. Repeat the process until the pot feels noticeably heavier. Take care to water the whole soil surface especially the area behind the trunk which is often neglected. If the soil is not taking the water and failing to absorb then change to the immersion technique (see below).
Misting your bonsai tree is an especially good idea if your specimen is kept indoors, this will help combat the dry inside conditions. Spraying the underside of the leaves as well as their tops with a hand spray bottle will help refresh the leaf and provide some much-needed moisture.
Immersion Technique
Immersing your bonsai tree is generally an emergency technique when your soil has dried out so it fails to absorb any water or if your bonsai is in clay-based soil that has become compacted. To follow the immersion technique, place your pot slowly into a bowl of room-temperature water until the soil is covered by the water. Air bubbles will then rise from the soil, and leave until the air bubbles stop which means the soil is wet (this can be up to 30 minutes). When lifting the pot from the water it should feel noticeably heavier otherwise it means that it is not damp throughout the soil.
This should not be a regular technique otherwise clay-based soils will become even more compact and gradually solidify, repotting your bonsai tree is then a necessary procedure to ensure you correctly care for your bonsai.
Automatic Bonsai Watering Methods
There are several automatic watering systems on the market now. It would probably be best not to consider this a long-term watering solution though.
Wiring Method
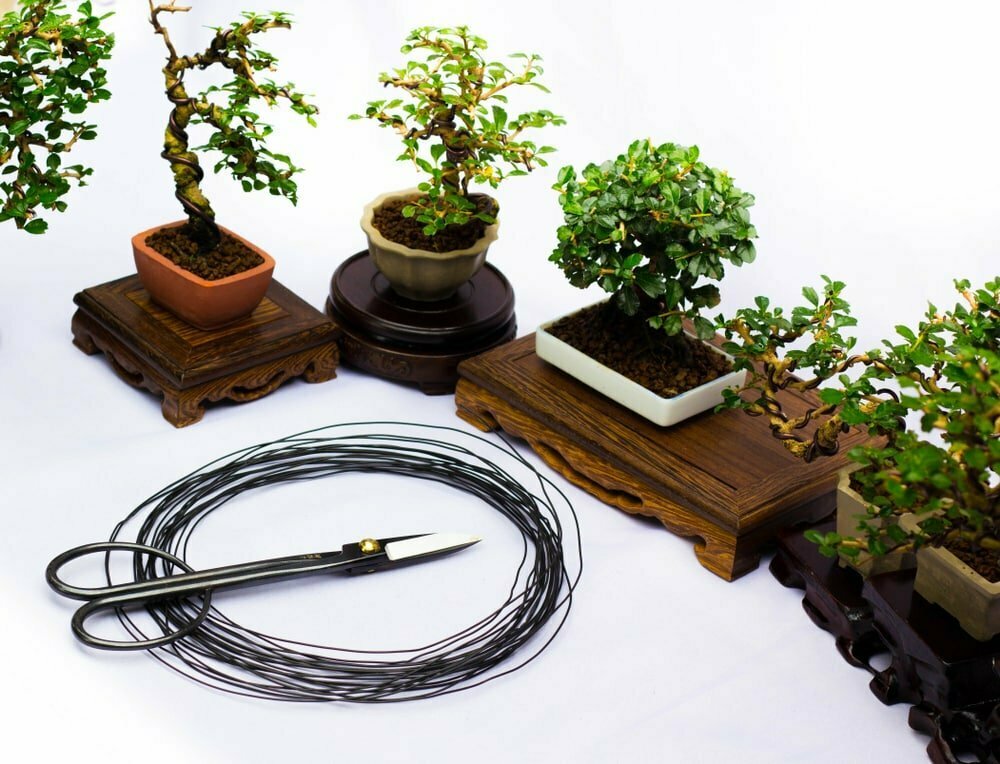
To create your desired bonsai tree style, wire is used to train the direction of branches. The appropriate thickness of wire is coiled around a branch, then the two are bent together into the required position to allow the branch to thicken. The wood then becomes denser making the branch hold its new shape once the wire has been removed.
So, firstly what wire is best to use? Traditionally annealed (softened) copper wire is used for all conifers due to its strength while using aluminum wire for deciduous bonsai. In the west, aluminum wire is more commonly used as it is cheaper and can be doubled up if necessary for added strength.
To anneal copper wire, it must be heated until red hot and then quickly submerged in cold water for a few seconds. Coiling the wire around the branch and bending the two together will harden the wire and in turn greatly increase its strength.
It is best to practice wiring on a twig offcut from a garden shrub to help gauge the appropriate wire thickness and necessary force to shape the branch.
When you are ready cut a piece of wire one-and-a-half times as long as the branch you wish to shape.
Firmly anchor the branch with the wire by coiling the wire at least twice around the trunk or the parent branch. Begin coiling the wire around the branch roughly at a 45-degree angle.
Hold each turn of the wire with one hand while you coil the next to avoid exerting too much pressure on the bark.
Bend the branch by using your thumbs as fulcrums on the inside of the curve and spreading the pressure of your fingers along as much of the branch as possible. Bend in stages, listening carefully for cracking bark at which point stop. If the branch has still not achieved the desired position, return to it every two or three weeks and bend it a little further until you are satisfied.
It is essential to check the branches regularly, especially at the top of the tree where the growth is strongest. When the wire seems to be biting into the bark it should be removed immediately, however, if the branch is not yet set then re-wiring it is suggested but in the opposite direction to minimize damage to the bark. The wire should ideally be removed by cutting it delicately piece by piece to prevent any tearing to the bark.
Wiring tips
- Always work outwards from the trunk, never inwards from the tip of the branch toward the trunk
- If a second wire is required, it should be applied in the same direction as the first.
- To avoid scars, prevent wires from crossing as it will create pressure points.
- Generally speaking young deciduous shoots and twigs can set within a month, while a springy conifer branch can take several years.
Steps for bonsai tree wiring
- The wire should be coiled at a 45-degree angle and touching the bark but not tight enough to bruise.
- If you need to reduce the thickness of the wire further along the branch/trunk, then overlap the lighter wire a few times to anchor the thinner wire before continuing along the branch.
- For a single branch, anchor the wire firmly by coiling it around the trunk several times.
- To further increase the anchorage, wiring can start by coiling around a nearby branch and then in the same direction coil through each ‘fork’ and around the branch to be repositioned.
- Similarly to the above, one piece of wire can be used to shape both arms of a fork, coiled in the same direction.
- Two parallel wires can be used to shape the thick part of the branch. One is diverted to shape a side branch while the other continues along the main branch.
- To bend the wired branches, lever the two using your thumbs but be careful not to bend too sharply at first.
- Once the branch has set or the wire has become too tight it should be removed. The wire should be cut off rather than unwound to risk damaging the bark
Bonsai Wire cutters
You could just use standard hardware store cutters to help apply the wire to the tree, however, when it comes to removing the wire further down the track it is wise to use proper Bonsai wire cutters to get close to the trunk/branches without damaging the tree.
Frequently Asked Questions (FAQ)

Do indoor bonsai thrive exclusively indoors?
No, because our living quarters are not the natural environment for plants. Certain subtropical and tropical plants do grow well indoors – particularly in a cold house environment, but they love to be outside during the summer months, in a location protected from the wind.
Is it possible to bring outdoor bonsai inside?
For a short period of time, yes. For instance, for special occasions when you want to use the plant as decoration. This does not present a problem during the summer when temperature differences between the indoors and the outdoors are negligible. However, if you want to bring a plant indoors during the winter months, make sure that it is not near or above a heat source. It is also important for the bonsai to have sufficient light.
Can an indoor bonsai be shaped and transplanted at any time during the year?
Generally speaking, yes. The optimal time is right before the plants begin their active growing period in spring. Plants in bloom are transplanted after the flowering period.
How often should I shorten/prune/cut new shoots?
When they have become slightly lignified, or when they have developed about six to eight pairs of leaves.
How often should I transplant an indoor bonsai?
This depends on the species and age of your bonsai. Young, fast-growing plants should be transplanted every year; older and slower-growing plants should be transplanted every two to three years.
Isn’t root pruning a ‘painful’ intrusion in the natural development of a plant?
No. The removal of dead roots protects the plant from rot and decay. Shortening the roots by a third encourages root growth and fosters healthy development. Both are only done when you are repotting the plant or when the root ball has become too dense.
Many negative opinions prevail regarding the wiring of branches and twigs. Are they justified?
No. Proper and careful wiring does not injure a plant but makes it more beautiful. Such shaping is a much more gentle process than the many influences a tree has to endure in nature such as storms, hail, and rock slides.
At what point does a gardener decide which form to choose for a bonsai plant?
In peace and quiet, the gardener will look “into” the shape of the growing plant in order to detect the form that nature gave it. Such contemplation gives the gardener the necessary insight as well as an understanding of which of the classic bonsai forms is the most appropriate.
Is there such a thing as a “bonsai seed”?
No, even if the description on some seed packages seems to imply it. The description on these packages should really read: “seeds suitable for bonsai”.
What is a solitaire?
A particularly beautifully shaped tree that is at least 25 years old.
Which plants are recommended for the beginner?
Always begin with young plants. All rubber trees (Ficus) work well since they thrive indoors without any problems. In addition, the elm and the cherry bush are good for beginners, because they are very forgiving when it comes to mistakes.
What is the life expectancy of an indoor bonsai?
There are no hard and fast rules. Particularly in their native habitat, but even in other regions, we know of bonsai trees that are 100 years old.
However, like everything else in nature, bonsai are subject to the laws that govern living and dying. Some live only for a relatively short time.
What has happened to a bonsai tree when it gets sick?
One possibility may have to do with the plant’s location. Even if it is placed close to a window, it may need additional (artificial) light. Or, often the humidity is too low. Are you watering properly? Too much watering is as bad as too little. When in doubt, read the part of the chapter about diseases and pests. If you still cannot determine the reasons for your problem, check with an expert at a nursery or botanical garden.
Is there a rule of thumb for watering?
The following will always work: don’t let the soil dry out completely. Following this advice, let the surface of the soil become slightly dry and then water carefully. Better yet, immerse the bonsai tree – in its container – in a water bath.
Is spraying the plant the way to increase humidity?
It is not the best method. Trays or containers filled with water, a water garden, or a water fountain are more effective.
What is the cause of the white deposits sometimes seen at the base of a trunk and the edge of the container?
Hard water, containing too much lime. While these deposits are not harmful, they are unsightly. They can be prevented by using soft water for watering.
Are “wet feet” dangerous for bonsai?
They are certainly not healthy. Excess water remaining in the saucer should be emptied.
Can there be good or even beneficial animals in bonsai?
Just as in the earth outdoors. Think, for instance of earthworms and snails… Remember, where there is earth, there is life. Allow it to be (unless it is a destructive pest).
Do indoor bonsai need to be fed?
Yes, just like other plants. See this page for some more fertilizing tips.
Should I feed a sick plant?
No. Weakened plants can only take up small amounts of nutrition. Additional fertilizer would damage the plant even further.
Is a tree sick if it loses all or part of its green leaves? (a special problem for Ficus trees)
Not necessarily. The most common reason is improper care: too little light and “cold” or “wet feet.”
What is happening when the leaves turn yellow and the inside of the tree?
This is usually nothing to worry about. It may be part of a normal process whereby older leaves are replaced to make room for new leaves; or else, the tree may not have enough light and air inside the crown. The tree may be suffering from a temporary drought. As long as the tree produces new shoots and leaves, everything is in order.
Why does moss last such a short time indoors?
Indoor bonsai usually come from a greenhouse. While the tree itself thrives, the surrounding moss does not. It is normal for the moss to become brown after a short time; this is not an indication that mistakes in care have been made.
How does one lose the fear of pruning or cutting?
Think of your hair: the more it is cut, the faster it grows. The same holds true for plants. Cutting back shoots and twigs encourages new growth.
Are bonsai appropriate for the office and a 5-day-week?
Absolutely. Water the bonsai – using the immersion method – and no harm will come over the weekend.
Why are bonsai so much more expensive than any other houseplants?
From the many plants available to us, only a limited number can be transformed into bonsai. In addition, every tree represents an enormous investment in time, gardening, know-how, and creativity.
Is the age of a bonsai plant important in terms of its value?
Age is only one criterion in determining the value of these small trees. Just as important is their form. Of course, many particularly beautiful specimens can be found among older trees – but younger trees can also be very charming and beautiful.
